Как добавить видео на сайт html, если вы полный чайник
Содержание:
- Kaltura HTML5 Video
- HTML Tags
- HTML5
- Учимся добавлять на веб-ресурс видео
- Обслуживание мобильных устройств
- A Primer on Video Formats
- Vimuse : jQuery HTML5 Media Player
- Как включить воспроизведение Адобе Флеш Плеер в браузере
- Definition and Usage
- JW Player
- Royal Video Player with HTML5 & JavaScript
- Insert videos from Youtube using the tag
- Learn More About Azure Media Services
- FV Flowplayer
- Соображения и ограничения
- Strapslide : jQuery Responsive Bootstrap Slider Plugin
- HTML Tutorial
- Optional Attributes
- jQuery Plugin to plays Audio & Video on Hover : Media Hovers
- Примеры элементов
- Plyr : Simple HTML5 Media Player
- Freemake Slider Plugin for WordPress
- Вставка аудио
- Вставка видео в HTML5 без плеера
- Атрибуты
- YouTube
- Definition and Usage
Kaltura HTML5 Video
Kaltura is a fully functional HTML5 video player with nice design, additional controls and full support for all major browsers, including old Internet Explorer versions. The player is very light and you don’t have to install any special modules to run it. As well as Video.js, Kaltura provides a great support for subtitles and close captions. However, it may require some tech knowledge to use, so if you don’t enjoy coding, you’d better choose something less complicated.
Pros:
- free
- customizable
- subtitles and close captions support
- old IE versions support
Cons:
requires additional tech knowledge for customization
HTML Tags
<!—><!DOCTYPE><a><abbr><acronym><address><applet><area><article><aside><audio><b><base><basefont><bdi><bdo><big><blockquote><body><br><button><canvas><caption><center><cite><code><col><colgroup><data><datalist><dd><del><details><dfn><dialog><dir><div><dl><dt><em><embed><fieldset><figcaption><figure><font><footer><form><frame><frameset><h1> — <h6><head><header><hr><html><i><iframe><img><input><ins><kbd><label><legend><li><link><main><map><mark><meta><meter><nav><noframes><noscript><object><ol><optgroup><option><output><p><param><picture><pre><progress><q><rp><rt><ruby><s><samp><script><section><select><small><source><span><strike><strong><style><sub><summary><sup><svg><table><tbody><td><template><textarea><tfoot><th><thead><time><title><tr><track><tt><u><ul><var><video>
HTML5
Новая версия языка разметки сильно упростила процесс работы с мультимедиа, и в частности, с видео, принеся с собой замечательный тег для его вставки на страницы сайтов.
Самый простой код вставки видео будет таким:
<video src="film.webm"></video>
Где film.webm — ссылка на воспроизводимый ролик.
Но чтобы видео отображалось корректно и с заданными параметрами, код нужно поменять приблизительно на такой:
<video controls>

<source src="videos/play.mp4" type="video/mp4">

<source src="videos/play.ogv" type="video/ogg">

<source src="videos/play.webm" type="video/webm">

</video>
video — контейнер, отображающий ролик.
source — тег, содержащий информацию о видео
Обратите внимание, что в примере код содержит ссылки аж на три ролика разных форматов. Дело в том, что пока разные браузеры поддерживают не все кодеки, и возможные проблемы с воспроизведением решаются кодированием одного и того же ролика с помощью разных кодеков и одновременным добавлением файлов в тег.
controls — включает панель воспроизведения.
src — задаёт путь к проигрываемому ролику.
type — указывает тип контента, на который ссылается атрибут src.
Есть и дополнительные, не попавшие в код, атрибуты, позволяющие настроить проигрывание.
width — определяет ширину области отображения.
height — задаёт высоту.
autoplay — воспроизводит ролик автоматически после загрузки страницы.
loop — зацикливает воспроизведение.
preload — загружает видео вместе со страницей.
poster — содержит адрес изображения, которое будет показываться вместо ролика, если он вдруг по каким-либо причинам не воспроизведётся.
Учимся добавлять на веб-ресурс видео
На сегодняшний день существует множество разных лазеек, вариантов и даже костылей. Я хочу рассказать о трех самых простых и удобных вариантах вставки видео.
Итак, я научу вас вставлять видеодокументы тремя способами:
- используя ссылку с YouTube;
- загружая клипы с локального компьютера;
- пользуясь стандартными механизмами html5.
1 2 3 4 5 6 7 8 9 10 11 12 13 14 15 16 17 18 19 20 21 22 23 24 25 26 |
<!doctype html>
<html>
  <head>
    <meta charset="utf-8">
    <title>Вставка видео из разных источников</title>
    <style>
		body {
		background:#FFFAF0;
		color:#A52A2A;
		width:100%;
		margin:0;
		text-align:center;
		}
		h1{
		font-style: oblique;
		text-decoration: underline;
		}
	</style>
	<link rel="stylesheet" href="style.css">
  </head>
  <body>
	<h1>Способ 1: добавление видео с веб-сервиса YouTube</h1>
	<h1>Способ 2: добавление видео с помощью плеера</h1>
	<h1>Способ 3: добавление видео при помощи тегов html5</h1>
  </body>
</html>
|
Сохраните заготовку программы. При запуске файла в окне браузера откроется веб-страница с тремя стилизованными заголовками.
Обслуживание мобильных устройств
Отображение полноэкранного фонового видео на мобильных устройствах связано с несколькими проблемами:
- Многие мобильные платформы отказываются автоматически воспроизводить HTML5- видео, чтобы уменьшить потребление трафика.
- На таких платформах фоновое видео будет отображаться со встроенной кнопкой воспроизведения, которая…
- … может перехватывать прикосновения к устройству, блокируя ссылки в контенте, размещенном поверх фонового видео.
Можно реализовать поддержку автозапуска видео с помощью JavaScript. Но самое простое решение – использовать медиа запрос, который отключает фоновое видео на маленьких экранах, заменяя его изображением-заполнителем. К существующему CSS-коду добавьте:
@media screen and (max-device-width: 800px) {
    html {
         background: url(polina.jpg) #000 no-repeat center center fixed;
    }
    #bgvid {
        display: none;
    }
}
Медиа запрос является наиболее важной частью приведенного выше кого. В настоящее время он определяет, имеет ли экран пользовательского устройства ширину менее 800 пикселей
Если это так, то переключается с фонового видео на статичное изображение.
A Primer on Video Formats
There are a number of formats to choose from, so let’s go through some of the ones you can use today. First and foremost, we should understand how adaptive streaming works, considering many of these technologies that lie ahead rely on this.
https://youtube.com/watch?v=AeJzoqtuf-o
Adaptive streaming segments video into small chunks. The ‘adaptive’ part of this is the fact that video is encoded at multiple bitrates and resolutions creating chunks of multiple sizes. From there, the player can choose between different bitrates/resolutions and adapt to larger or smaller chunks automatically as network conditions change.
Scott Hanselman describes it (well, Smooth Streaming at least) well.
Progressive MP4
This downloads and caches video on the viewer’s computer. A short period of time is required to buffer and cache the beginning of the media file before it starts playing. Once the video has been cached, subsequent viewing does not require any buffering. Using the standard HTTP protocol, progressively downloaded files are generally delivered through a content delivery network (CDN). So your video player creates a direct HTTP connection with the CDN’s (Azure) servers to retrieve the content.
The downfall to using something like this is the wasted bandwidth. The player will start video playback as soon as it has enough data to do so, but it will continue to download until it has received the whole file, regardless of how much the user watches. What happens when the viewer leaves after one minute? Wasted bandwidth.
Moreover, this does not allow the quality of the video to change mid-download, unlike the formats listed below.
HLS
HTTP Live Streaming (HLS) is owned by Apple and works is based on the idea of adaptive streaming, and usually done in 10 second chunks. Additionally, it works for both video on demand content, too. It supports both live and on-demand video.
Smooth Streaming
This was announced in October of 2008 as part of Silverlight, and is a feature of Internet Information Services (IIS) Media Services, an integrated HTTP-based media delivery platform.
Smooth Streaming has all of the typical characteristics of adaptive streaming. This is delivered over HTTP, segmented into small chunks, and usually multiple bit rates are encoded so that the player can look at your network conditions to choose the best video bit rate to deliver an optimal viewing experience.
Low web-based infrastructure costs, firewall compatibility and bit rate switching are just some of the perks of adaptive streaming.
MPEG Dash
The big differentiator with DASH is that it is an international standard that is now controlled by a standards body – the Motion Picture Experts Group (MPEG) – instead of being controlled by Microsoft (Smooth Streaming) or Apple (HLS). Several companies participated in the creation and standardization efforts around MPEG DASH, including Microsoft, Apple, Netflix, Qualcomm, Ericsson, Samsung, and many more.
We see MPEG-DASH as the eventual replacement for all of the features that we have introduced and implemented in the past years with Smooth Streaming. Over time we will get out DASH support to have feature parity with Smooth, and introduce some even cooler features that are only available to us in an industry standard like DASH .
Vimuse : jQuery HTML5 Media Player
June 1, 2014
|
HTML5, jSON, Plugins, Premium, Responsive, Video & Audio
Vimuse HTML5 Media Player is a jQuery plugin that allows you to play both audio and video in a modern and sleek interface. You can choose to play your own audio/video files or videos from Youtube/Vimeo or even Shoutcast streams. The player features a fluid responsive design and can fit in any screen size ranging from mobile phones to desktop browsers. The player is also optimized for retina and touch screens and provides the feel of a native app.
Features:
- Play video and audio files.
- HTML5 playback with Flash/Silverlight fallback.
- Playlist data is passed through JSON.
- Special layout for audio-only mode.
- Play videos from Youtube/Vimeo.
- Pull videos from Youtube user, playlist or search query.
- Pull videos from Vimeo user, album or channel.
- Play Shoutcast streams and show track info and cover-art.
- Extract audio info from ID3 tags – cover, track, artist, album.
- Build playlist by scanning folder for mp3 files.
- Several layout options.
- Player API functions and events.
- Mobile, retina and touch screen optimized
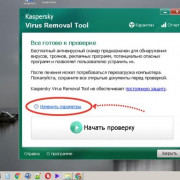
Как включить воспроизведение Адобе Флеш Плеер в браузере
Веб-браузеры обновляются автоматически, изредка уведомляя об этом пользователей. Несмотря на это по разным причинам на компьютере может быть установлена старая версия браузера. Или программа, которая не справляется с приложениями Flash без дополнительных технологий.
Перед установкой описанных выше программ нужно проверить обновления своего браузера. На примере Google Chrome:
- Запускаем обозреватель;
- Нажимаем на кнопку меню вверху справа;
- В списке параметров выбираем внизу пункт «Справка»;
- Во всплывающем окне нажмите на строку «О браузере»;
- Автоматически в окне начнётся проверка последней версии. Если она доступна, подождите завершения процесса и нажмите на кнопку «Перезапустить».
С последними обновлениями в вашу программу должны быть установлены соответствующие технологии, которые позволяют использовать контент, воспроизводить его вместо старого Adobe Flash Player. Если вы пользуетесь другим браузером, то проверка обновлений на нём происходит подобным образом. После того, как вы перешли на сайт и увидели запрос на установку устаревшего плеера, проделайте со своим браузером то же, чтобы обновить его до последней стабильной и официальной версии.
Definition and Usage
The attribute specifies the location (URL) of the video file.
The example above uses an Ogg file, and will work in Chrome, Edge, Firefox
and Opera.
To play the video in old Internet Explorer and Safari, we must use an MPEG4 file.
To make it work in all browsers — add several
elements inside the element. Each elements can link to
different video files. The browser will use the first recognized format:
Example
<video width=»320″ height=»240″ controls>
<source src=»movie.mp4″ type=»video/mp4″>
<source src=»movie.ogg» type=»video/ogg»>
Your browser does not support the video tag.
</video>
JW Player
JW Player is a great solution for enterprises and big companies. The JW stands for Jeroen Wijering, the creator of the player. There is a free version of JW Player and paid one available for $149 or $249/year depending on a number of features. If you don’t want to pay, then get a free version with limited functionality, but for non-commercial use only. As for the player itself, it looks very stylish, plain, offers all the standard controls, and will for sure make your site look even more fascinating. Besides, you can choose between 8 ready skins or even create your own one.
JW Player is a must-have for sites with huge traffic that use to stream a lot of live videos. The player provides perfect support for adaptive streaming. It means your live presentation can be watched almost with any browser or device.
Pros:
- customizable
- subtitles support
- good support for portable gadgets
Cons:
- logo in free version
- paid for commercial use
- customization requires tech knowledge
Here are 6 most popular HTML5 video that you can use to embed a video on a site or blog. Please tell us in comments what solution you opt for and why.
Additional resources on HTML5:
- Video tutorial on HTML5 embed by Freemake
- Full HTML5 specification by The World Wide Web Consortium
- HTML5 developer guide by Mozilla
- HTML5 designer guide by Adobe
Royal Video Player with HTML5 & JavaScript
April 18, 2014
|
Core Java Script, HTML5, Premium, Responsive, Video & Audio
Royal Video Player is a powerful responsive video player that can play local videos, streaming videos from a server or Youtube videos. It only requires the mp4 format (the best and most used format on the web) and it will work on mobile devices and desktop machines no matter which browser is used including older browsers like IE7/IE8, this is made possible by incorporating four video engines into the Royal Video Player, basically it has built-in a HTML5 Youtube video engine, normal video engine, flash Youtube video engine and flash normal video engine. Royal Video Player supports unlimited playlists and each playlist can have unlimited videos. The playlists can be loaded from a simple HTML markup, XML file, video folder or youtube playlist.
Insert videos from Youtube using the tag
The easiest way to play videos in HTML, is using YouTube as a source. First, you need to upload the video to YouTube or copy the embed code of an existing video, which will be inserted in the <iframe> element in your web page.
To have the embed link of the YouTube video, follow these simple steps:
- Open the video on YouTube and click the share button.
- Open the Embed code.
- Copy the Source link.
As you copy the embed link you can insert it into your HTML document as the src of your <iframe> element. Also, define the width and height for your video. Now, let’s see how it will look like.
Example of inserting a video from Youtube using the <iframe> tag:
Learn More About Azure Media Services
Here are some great resources to learn more in-depth on media, Azure, and how to get set-up quickly:
- Azure Media Services 101 — Azure Fridays (Channel 9)
- Getting started with Azure Media Services (video)
- Dynamic Packaging with Azure Media Services
Or our team’s broader learning series on HTML, CSS, and JS:
- Practical Performance Tips to Make your HTML/JavaScript Faster (a 7-part series from responsive design to casual games to performance optimization)
- The Modern Web Platform JumpStart (the fundamentals of HTML, CSS, and JS)
- Developing Universal Windows App with HTML and JavaScript JumpStart (use the JS you’ve already created to build an app)
This article is part of the web dev tech series from Microsoft. We’re excited to share Project Spartan and its new rendering engine with you. Get free virtual machines or test remotely on your Mac, iOS, Android, or Windows device at modern.IE.
FV Flowplayer
Бесплатная, лёгкая в использовании альтернатива для встраивания видео в формате FLV и MPEG4 на страницы или в записи.
Особенности:
- Автоматическая проверка кодировки видео.
- Адаптивный.
- Настраиваемые начальный и конечный экраны. Вы можете использовать персональный дизайн до и после видео.
- Все дополнительные функции доступны в стандартной сборке (Google Analytics, горячие клавиши, субтитры, замедленное воспроизведение, случайная перемотка, поддержка Retina-дисплеев).
- Доступна профессиональная лицензия для одного сайта (JW Player требует пакет из пяти лицензий для доступа ко всей функциональности)
- Кроссбраузерный.
- Поддержка Amazon S3, CloudFront и других сетей доставки контента.
- Полностью брендируемый.
- Поддерживает продвинутую видео рекламу.
Соображения и ограничения
При реализации необходимо учесть несколько факторов:
- Автоматическое воспроизведение видео и звука должно быть отключено. Можно создать кнопку включения звука с помощью JavaScript.
- Видео должно иметь изображение-заполнитель для браузеров, которые не поддерживают HTML5. Оно также отображается на мобильных устройствах. Многие смартфоны и планшеты не поддерживают атрибут autoplay.
- Короткое видео может казаться повторяющимся (большинство роликов будет воспроизводиться циклически). Слишком длинное заслуживает того, чтобы стать отдельным элементом дизайна. Оптимальная продолжительность фонового видео составляет 12- 30 секунд.
- Видео должно быть небольшим и сжатым. В то же время оно должно масштабироваться на разных устройствах и экранах. Можно использовать медиазапросы или matchmedia для отправки версий видео разного качества на пользовательские устройства с экранами различных размеров. При этом размер ролика не должен превышать 5 МБ, а в идеале – менее 500 КБ.
Strapslide : jQuery Responsive Bootstrap Slider Plugin
August 16, 2013
|
Bootstrap, CSS2 / CSS3.0, HTML5, Plugins, Premium, Responsive, Slider
Strapslide is the ultimate premium Bootstrap Slider Plugin offering the capability to show images, videos and captions paired with simple, modern and fancy 3D transitions. Even more important, it is fully responsive and mobile optimized and can take on any dimensions.
Features:
- jQuery 1.7 – jQuery 2.x Supported
- Based on Bootstrap
- CSS3 Transition library
- Touch Enabled
- Responsive
- Pause on Hover
- Dynamic Pagination
- Keyboard Navigation
- HTML5 Support to play self hosted videos
- Animation of each Caption element
- Powerful CSS Transitions with jQuery FallBack
- Adapts to Bootstrap spans
- Set Fullscreen YouTube and Vimeo Videos
HTML Tutorial
HTML HOMEHTML IntroductionHTML EditorsHTML BasicHTML ElementsHTML AttributesHTML HeadingsHTML ParagraphsHTML StylesHTML FormattingHTML QuotationsHTML CommentsHTML Colors
Colors
RGB
HEX
HSL
HTML CSSHTML Links
Links
Link Colors
Link Bookmarks
HTML Images
Images
Image Map
Background Images
The Picture Element
HTML Tables
HTML Tables
Table Borders
Table Sizes
Table Headers
Padding & Spacing
Colspan & Rowspan
Table Styling
Table Colgroup
HTML Lists
Lists
Unordered Lists
Ordered Lists
Other Lists
HTML Block & InlineHTML ClassesHTML IdHTML IframesHTML JavaScriptHTML File PathsHTML HeadHTML LayoutHTML ResponsiveHTML ComputercodeHTML SemanticsHTML Style GuideHTML EntitiesHTML SymbolsHTML EmojisHTML CharsetHTML URL EncodeHTML vs. XHTML
Optional Attributes
| Attribute | Value | Description |
|---|---|---|
| autoplay | autoplay | Specifies that the video will start playing as soon as it is ready |
| controls | controls | Specifies that video controls should be displayed (such as a play/pause button etc). |
| height | pixels | Sets the height of the video player |
| loop | loop | Specifies that the video will start over again, every time it is finished |
| muted | muted | Specifies that the audio output of the video should be muted |
| poster | URL | Specifies an image to be shown while the video is downloading, or until the user hits the play button |
| preload | auto metadata none |
Specifies if and how the author thinks the video should be loaded when the page loads |
| src | URL | Specifies the URL of the video file |
| width | pixels | Sets the width of the video player |
jQuery Plugin to plays Audio & Video on Hover : Media Hovers
November 21, 2017
|
HTML5, Plugins, Premium, Video & Audio
Get Motion to your images. Media Hovers is a responsive HTML5 plugin which plays audio and video on hover. It can be applied to any element. Just specify thumbnail and audio or video file and turn it into your hover. Media Hovers also supports lightbox mode where images and videos can be viewed in larger mode.
Features:
- HTML5 video and audio support
- Cross browser compatible
- IOS and Android support
- Font Awesome Library icons
- Mix both audio and videos in the same page
- Optional image slideshows while audio plays
- Social sharing support (facebook, twitter, google plus)
- Lightbox support
Примеры элементов
Следующий фрагмент кода HTML5 встроит видео WebM в веб-страницу.
<video src="movie.webm" poster="movie.jpg" controls>
	This is fallback content to display for user agents that do not support the video tag.
</video>
Атрибут «controls» позволяет собственному пользовательскому интерфейсу браузера управлять воспроизведением. В качестве альтернативы воспроизведением можно управлять с помощью JavaScript , который веб-дизайнер может использовать для создания пользовательского интерфейса. Необязательный атрибут «poster» указывает изображение, которое будет отображаться на месте видео перед началом воспроизведения. Его цель — представить видео.
Множественные источники
Поддержка видеоформатов различается в зависимости от браузера (см. Ниже), поэтому веб-страница может предоставлять видео в нескольких форматах. Для других функций иногда используется анализ браузера , который может быть подвержен ошибкам: любой веб-разработчик знает браузеры, что неизбежно будет неполным или устаревшим. Соответствующий браузер лучше всех знает, какие форматы он может использовать. Элемент «видео» поддерживает откат за счет указания нескольких источников. Используя любое количество элементов <source>, как показано ниже, браузер автоматически выберет файл для загрузки. В качестве альтернативы для достижения того же можно использовать функцию JavaScript canPlayType () . Атрибут «type» указывает тип MIME и, возможно, список кодеков, который помогает браузеру определить, может ли он декодировать файл, не загружая его. Тип MIME обозначает формат контейнера файла, а формат контейнера определяет интерпретацию строки кодека.
<video poster="poster.jpg" controls>
	<source src="av1.mp4" type='video/mp4; codecs="av01.0.00M.08, opus"'>
	<source src="avc.mp4" type='video/mp4; codecs="avc1.4D401E, mp4a.40.2"'>
	<source src="vp9.webm" type='video/webm; codecs="vp9.0, opus"'>
	<source src="theora.ogv" type='video/ogg; codecs="theora, vorbis"'>
	<p>This is fallback content to display for user agents that do not support the video tag.</p>
</video>
Plyr : Simple HTML5 Media Player
May 21, 2016
|
Core Java Script, HTML5, Video & Audio
A simple, accessible and customizable HTML5, YouTube and Vimeo media player.
- Accessible – full support for VTT captions and screen readers
- Lightweight – under 10KB minified and gzipped
- Customisable – make the player look how you want with the markup you want
- Semantic – uses the right elements. for volume and for progress and well, s for buttons. There’s no or button hacks
- Responsive – as you’d expect these days
- HTML Video & Audio – support for both formats
- Embedded Video – support for YouTube and Vimeo video playback
- API – toggle playback, volume, seeking, and more
Freemake Slider Plugin for WordPress
If you have a WordPress-based blog or site, one more Freemake tool which you can use to embed a video on it is Freemake Slider Plugin for WordPress. It’s a free plugin with a high number of cool options.
First of all, Freemake Slider is completely responsive what means that your users will be able to watch your embedded videos in any browser and on any device: iPhone, iPad, Android smartphone or tablet, Windows portable gadgets, and so on. The plugin supports YouTube videos and playlists, Vimeo videos and offline videos from your PC. To add a video into Freemake Slider, use one of the corresponding blue buttons: Add Video, Add YouTube, Add YouTube playlist, Add Vimeo.
Upload your offline videos from the PC or insert your YouTube/Vimeo video links into corresponding plugin fields. Select a template style for your video slider. There are 23 templates to choose from: Classic, Auto Scroll, Cards, Minimalistic, etc. Have a look at all of them and select the one that suits your website or blog best of all. You can add as many videos as you wish. They’ll be organized in a beautiful and compact way. There is no need to paste numerous videos one by one anymore.
What is great about Freemake Slider Plugin for WordPress is its high level of customization. You can select arrow image, spacing between video sliders; choose playback options (auto play, random, circular, and pause on mouse over), and change the number of visible items.
One more important thing to mention is Lightbox support which settings can also be changed to your liking. For example, you may customize slideshow options, choose overlay color and opacity, set thumbnails and text options, enable social media buttons and much more.
When you are done with your video slideshow, copy the ready shortcode and paste it into your post or website where you want your videos to be.
Pros:
- free;
- easy to use;
- supports offline, YouTube and Vimeo videos;
- supports pictures;
- keeps multiple videos in a compact way;
- provides many slider styles;
- highly customizable.
Cons:
you need to have YouTube API if you want to embed a complete YouTube playlist.
Вставка аудио
Для того чтобы вставить аудио на страницу у нас в распоряжении опять 2 варианта: с mp3-плеером и без него — с помощью кода HTML5. У этого способа вставки аудио те же плюсы и минусы: он проще, но не поддерживается старыми браузерами (IE ниже v.9).
Способ 1. Код вставки аудио на страницу (где «papka/name.…» — путь к аудиофайлу, а «name» — его имя):
<audio controls>
    <source src="papka/name.mp3">
    <source src="papka/name.ogg">
    <source src="papka/name.wav">
    <p>Ваш браузер не поддерживает прослушивание</p>
    <a href="papka/name.mp3">Скачать аудио</a>
</audio>
Нужно конвертировать аудиофайл в три формата, а если браузер у пользователя окажется устаревшим, то он сможет скачать файл.
Для снижения нагрузки на ваш сервер, желательно хранить аудиофайлы на стороннем ресурсе, таком как Я.Диск (см. ссылку выше).
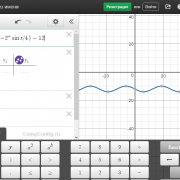
При сборке аудио-плеера важны два параметра: адрес плеера — вы можете указать папку своего домена (что предпочтительнее), или подгружать его прямо с указанного сайта. Это отразится в коде, который вы сможете скопировать для вставки на веб-страницу, сразу после окончания сборки.
Второй параметр будет влиять на размеры и вид панели плеера, а так же надписи «Прослушать» — её вы измените на свою. Выглядеть панель будет как на следующем скриншоте, но вы сможете изменить цвет, форму и кнопки управления на более красивые:
Если нужно — укажите автозапуск, а полученный код разместите на нужной странице — его, кстати, всегда можно будет отредактировать: вручную или снова посетив страницу сборки плеера.
структура
версии
заголовки
абзацы
списки
изображения
ссылки
таблицы
формы
видео
аудио
Справочник HTML
Справочник CSS
Вёрстка сайта
Поделиться с друзьями:
Вставка видео в HTML5 без плеера
А так можно вставить видео на страницу с HTML5, здесь атрибут poster — это путь к изображению-заставке:
<video width="400" height="300" controls poster="images/zastavka.png">
    <source src="papka/name.mp4" type='video/mp4; codecs="avc1.42E01E, mp4a.40.2"'>
    <source src="papka/name.ogv" type='video/ogg; codecs="theora, vorbis"'>
    <source src="papka/name.webm" type='video/webm; codecs="vp8, vorbis"'>
    <p>Ваш браузер не поддерживает просмотр</p>
    <a href="papka/name.mp4">Скачать видео</a>
</video>
Чтобы добиться воспроизведения ролика в различных браузерах, видео необходимо конвертировать, а в папку поместить 3 видеофайла в разных форматах. Это можно сделать онлайн, например, здесь: online-convert.com.
Минусом этого способа будет то, что на некоторых устаревших устройствах код будет работать некорректно. Если кроссбраузерность жизненно необходима, то лучше применять вариант №1 — вставку видео с использованием плеера.
Обязательно прочитайте о раскрутке сайта на YouTube, где представлена инструкция по загрузке видео на сервис и правильном его оформлении. Этим способом можно продвигать любые товары и услуги в интернете, в т.ч. партнёрские инфопродукты.
Атрибуты
- Видео начинает воспроизводиться автоматически после загрузки страницы.
- Атрибут для определения временных диапазонов буферизованных носителей. Этот атрибут содержит объект .
- Добавляет панель управления к видеоролику.
- Этот атрибут указывает, следует ли использовать CORS для извлечения связанного изображения.
- Задаёт высоту области для воспроизведения видеоролика.
- Повторяет воспроизведение видео с начала после его завершения.
- Логический атрибут, который определяет значение по умолчания для аудио дорожки, содержащуюся в видео. Если атрибут указан, то аудио дорожка воспроизводиться не будет. Значение атрибута по умолчанию — «ложь», и это означает, что звук будет воспроизводиться, когда видео воспроизводится.
- Атрибут , указывающий все диапазоны воспроизводимого видео.
- Указывает адрес картинки, которая будет отображаться, пока видео не доступно или не воспроизводится.
- Используется для загрузки видео вместе с загрузкой веб-страницы.
- Указывает путь к воспроизводимому видеоролику.
- Задаёт ширину области для воспроизведения видеоролика.
autoplay
При наличии этого атрибута видео начинает воспроизводиться автоматически после загрузки страницы. Атрибут отменяет действие .
Синтаксис
Значения
В качестве значения указывается , также допустимо вообще не указывать никакое значение.
Значение по умолчанию
По умолчанию этот атрибут выключен.
controls
Добавляет панель управления к видеоролику. Вид панели и её содержимое зависит от браузера и может в себя включать кнопку воспроизведения, паузы, перемотки, перехода в полноэкранный режим; ползунка для изменения уровня громкости и др.
Синтаксис
Значения
В качестве значения указывается , также допустимо писать атрибут без значения.
Значение по умолчанию
По умолчанию этот атрибут выключен.
height
Атрибут задаёт высоту области для воспроизведения видеоролика. Само видео меняет свои размеры в большую или меньшую сторону, чтобы вписаться в заданные рамки, но его пропорции при этом остаются прежними.
Синтаксис
Значения
Любое целое положительное число в пикселях или процентах.
Значение по умолчанию
Исходная высота берётся из параметров видео. Если эти параметры не доступны, тогда принимается равной высоте картинке, заданной атрибутом . В противном случае высота видео устанавливается 150 пикселей.
loop
Зацикливает воспроизведение видео, оно повторяется каждый раз с начала после завершения.
Синтаксис
Значения
В качестве значения указывается , также допустимо писать атрибут без значения.
Значение по умолчанию
По умолчанию этот атрибут выключен.
poster
Указывает адрес картинки, которая будет отображаться, пока видео не доступно или не вопроизводится. Само изображение может быть в любом доступном формате: GIF, PNG, JPEG. Если атрибут не указан, браузер постарается отобразить первый кадр видео.
Синтаксис
Значения
В качестве значения принимается полный или относительный путь к графическому файлу.
Значение по умолчанию
Нет.
preload
Используется для загрузки видео вместе с загрузкой веб-страницы. Этот атрибут игнорируется, если установлен .
Синтаксис
Значения
- Не загружать видео.
- Загрузить только служебную информацию (размеры видео, первый кадр, продолжительность и др.).
- Загрузить видео целиком при загрузке страницы.
Значение по умолчанию
src
Указывает путь к воспроизводимому видеоролику. Для этой же цели можно использовать элемент .
Синтаксис
Значения
В качестве значения принимается полный или относительный путь к файлу.
Значение по умолчанию
Нет.
width
Атрибут задаёт ширину области для воспроизведения видеоролика. Само видео меняет свои размеры в большую или меньшую сторону, чтобы вписаться в указанную ширину, но его пропорции при этом не искажаются.
Синтаксис
Значения
Любое целое положительное число в пикселях или процентах.
Значение по умолчанию
Исходная ширина берётся из параметров видео, если это значение не доступно, тогда принимается равной ширине картинке, заданной атрибутом . Если этот атрибут не установлен, ширина устанавливается как 300 пикселей.
YouTube
If you run out of space on your server, then why not using free YouTube hosting? Since January 2015, YouTube switched to HTML5 as a default video player. It means that you don’t have to worry about video encoding, your video will be playable in any browser with YouTube.
Everything you need is to upload a video on YouTube and then copy the code and insert in on your page.
Please note that in case you want to upload a DVD title to YouTube, you will need first to convert it to a compatible format with DVD ripper software.
Again, it’s free and easy, and you get a standard YouTube player with all the necessary controls. There are a couple of disadvantages, however. First of all, you need to create a YouTube account, in case you don’t have it. And the 2nd thing is that your video may be easily deleted if it violates YouTube policy. However, if you are a beginner in site creation, this option will be the simplest for you.
Pros:
- free
- hosts video on it’s own server
- no need to convert video
Cons:
- non customizable
- video might be deleted
Definition and Usage
The attribute specifies the width of a video player, in pixels.
Tip: Always specify both the and
attributes for videos. If these attributes are set, the required space for the
video is reserved when the page is loaded. However, without these attributes,
the browser does not know the size of the video, and cannot reserve the
appropriate space to it. The effect will be that the page layout will change
during loading (while the video loads).
Note: Do not rescale video with the and attributes!
Downsizing a large video with these attributes forces a user to
download the original video (even if it looks small on the page). The correct
way to rescale a video is with a program, before using it on a web page.